
Sitecore
Sitecore – Using SSL part 1
Formerly known as Secure Sockets Layer (SSL), nowadays it has become increasingly important as a result to keep data protected by establishing an encrypted link between a server and a client.
This is the first in a series of posts about using SSL in a Sitecore environment; I hope you enjoy it.
In today’s post, I’ll give an overview of SSL, how to create a self-signed certificate, and import it in IIS.
A handshake says it all
The processes running behind the scenes when you attempt to access a secure website is known as the SSL Handshake. And as you can see illustrated below, there are 5 steps to establish a secure connection between client and server.
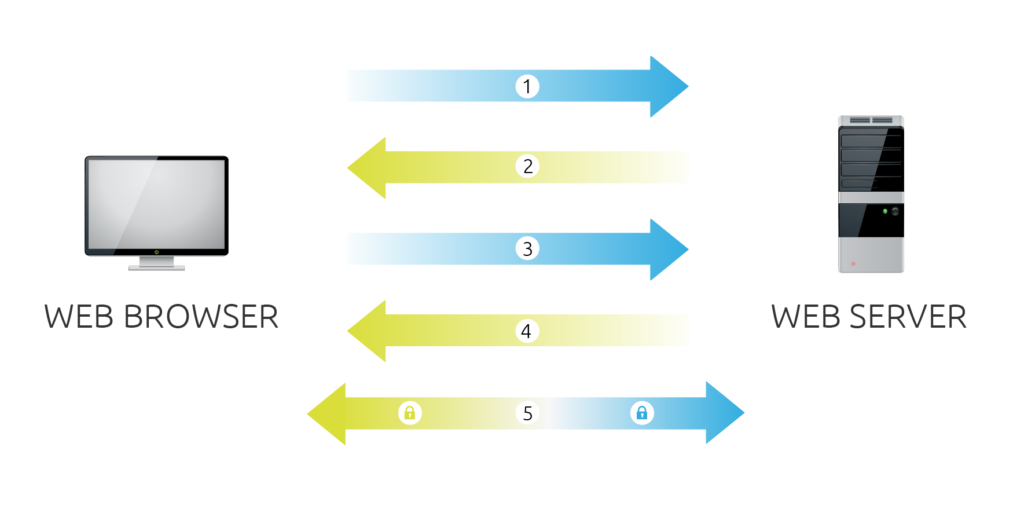
Many flavors, but only one purpose: protect your data!
You will find SSL in a number of different flavors (Wildcard, SAN and etc.), each with their own particularities, so choose them according to your organization’s needs.
- Single Domain
Only a single domain is protected, for example yourdomain.com
- Subject Alternative Names
Multiple domains in the same certificate, for example yourdomain.com and differentdomain.com
- Wildcard
All domains secured, for example *.mydomain.com secures www.mydomain.com and services.mydomain.com
Trust in yourself
You can always rely on self-signed certificates to replicate in your own environment the effect SSL can have on your website! However, keep in mind that others won’t trust you as you do – which means that you MUST avoid using self-signed certificates in production solutions.
You’ve probably seen many self-signed certificates, and since Windows 8 there’s a cmdlet in PowerShell called New-SelfSignedCertificate that makes it easier to create self-signed certificates than any other tool.
In order to use the following commands, you must have at least Windows 8
Step 1 – Create a Self-signed certificate
Run Windows PowerShell as Administrator
Type the following command, then hit enter
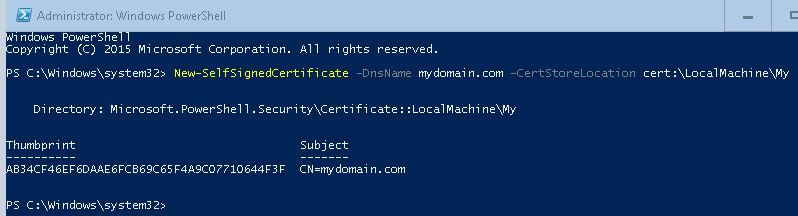
New-SelfSignedCertificate -DnsName mydomain.com -CertStoreLocation cert:\LocalMachine\My
- You should receive a similar output, as you can see in the image below
Step 2 – Use Self-Signed Certificate on IIS
- Open IIS, expand sites
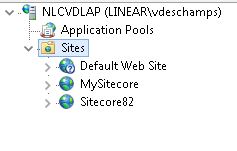
- Select the Site you want to use Self-Signed certificate, right-click on it then Edit Bindings
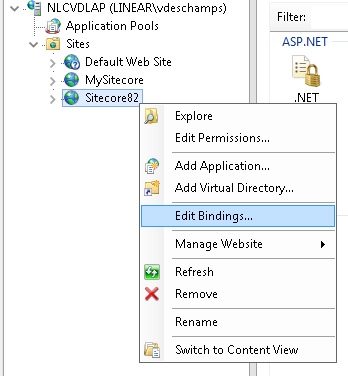
- In Site Bindings, click Add
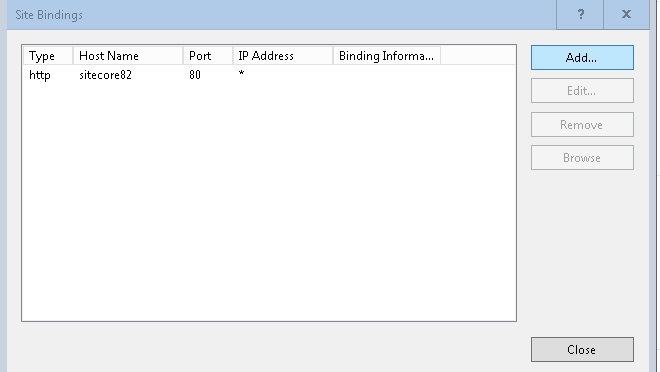
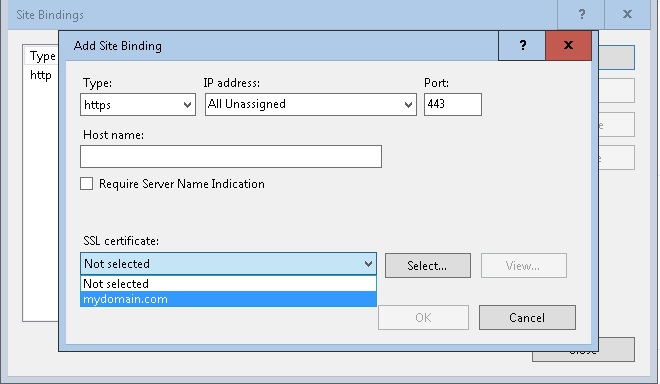
- In Add Site Binding, choose Type HTTPS and on SSL certificate choose the certificate create in Step 1, and click Ok then Close (Site Bindings window)
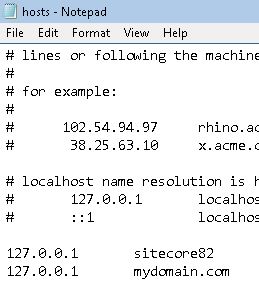
Please note that I already have mydomain.com in my hosts file (C:\Windows\System32\drivers\etc\hosts) pointing to 127.0.0.1
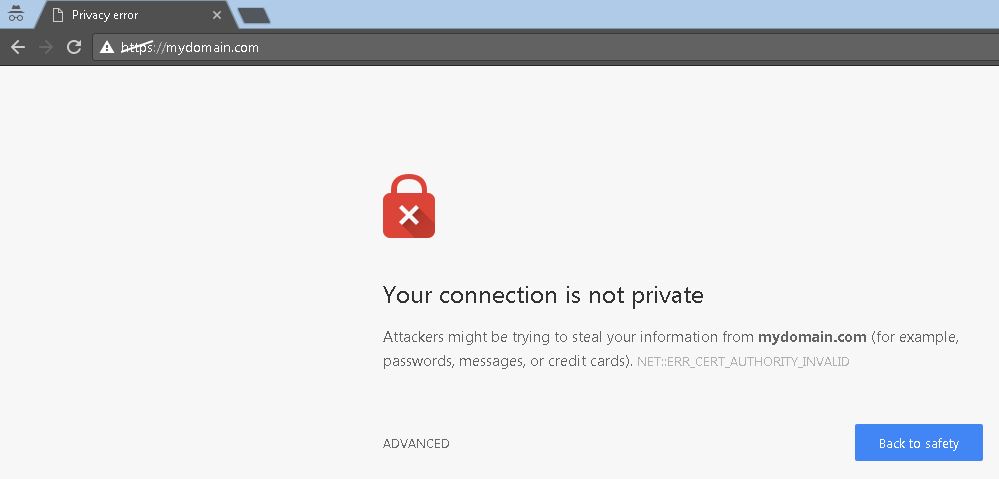
- Go to your browser and access your website using the domain used on –DnsName parameter on Step 1, in my case was mydomain.com, so https://mydomain.com
Step 3 (PLUS!!!) – Export Self-Signed certificate as PFX file with a password
In case you want to install on another machine or send to a colleague
- In the same Windows PowerShell, copy the Self-Signed Thumbprint and keep it (in my case AB34CF46EF6DAAE6FCB69C65F4A9C07710644F3F)

- Create a password using the following command
$sslPassword = ConvertTo-SecureString "P@ssw0rd" -Force -AsPlainText
- Export the certificate as PFX file using the command below
Export-PfxCertificate -Cert cert:\LocalMachine\My\AB34CF46EF6DAAE6FCB69C65F4A9C07710644F3F -FilePath C:\temp\mydomain.pfx -Password $sslPassword
- You should receive a similar output, as you can see in the image below

- Navigate to the folder you saved the PFX file and check if it was created. In my case, it was on C:\temp

Step 4 (PLUS!!!) – Stop receiving SSL errors with Self-Signed certificates
Execute Step 3 and get yourself a PFX file
Press Windows+R to open Run, type mmc in the empty box and click Ok
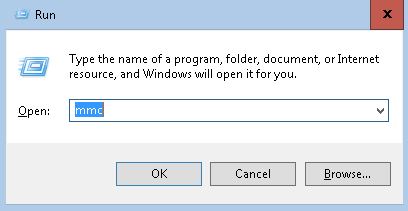
Click Yes in the User Account Control window
On the File menu, click Add/Remove Snap In
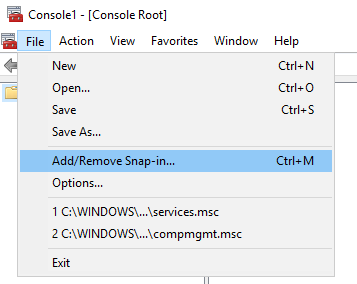
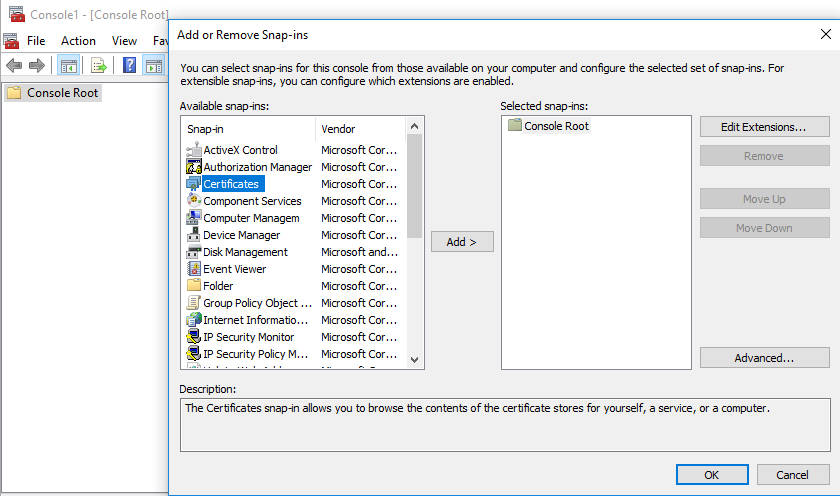
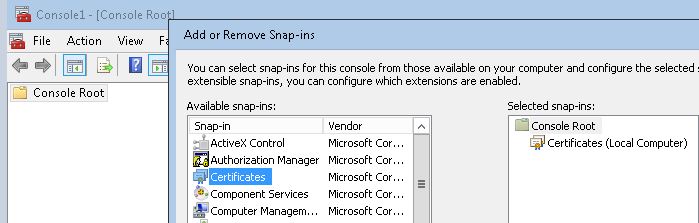
- Under Available snap-ins, double-click Certificates
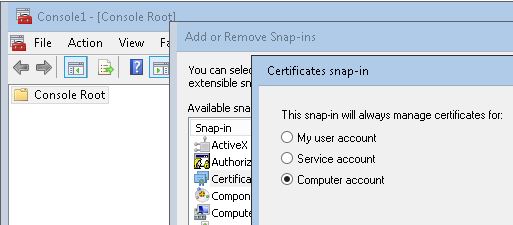
- Select Computer Account, and then click Next
- Keep Local Computer on Select Computer window, and then click Finish
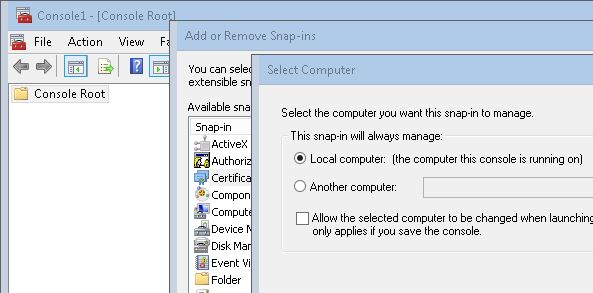
- Click Ok on Add or Remove Snap-ins
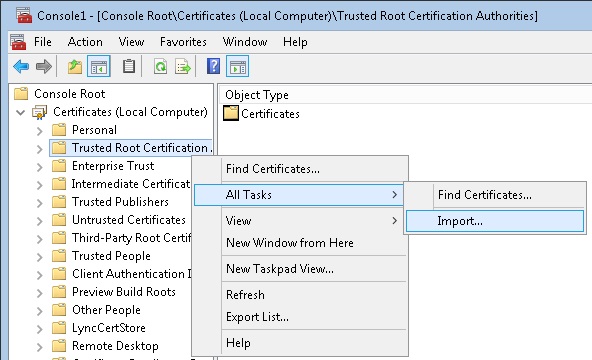
- Expand Certificates, find and right-click in Trusted Root Certification then choose Import
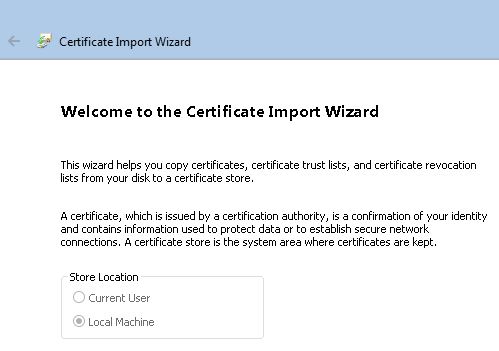
- Welcome to the Certificate Import Wizard screen, click Next
- File to import window click in Browse…
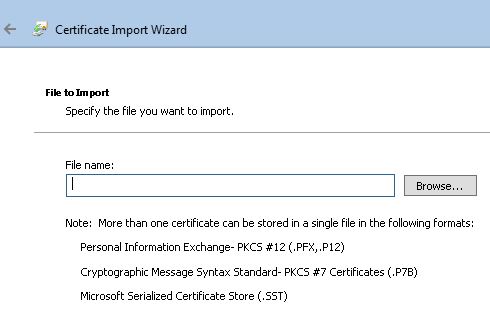
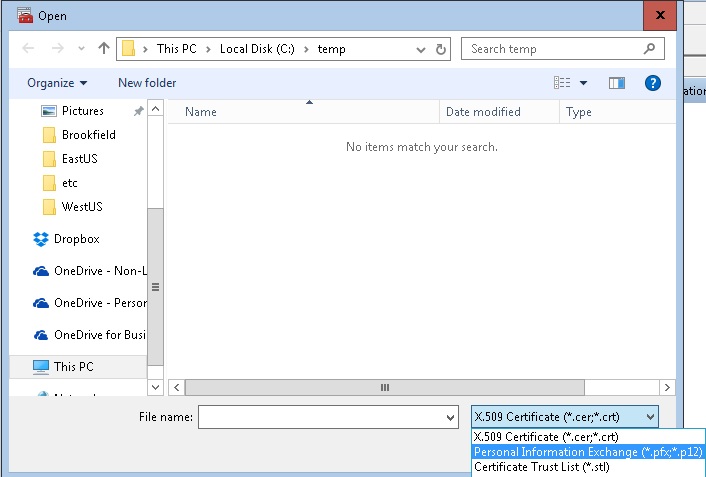
- At the bottom right change the Certificate file to Personal Information Exchange (*.pfx, *.p12)
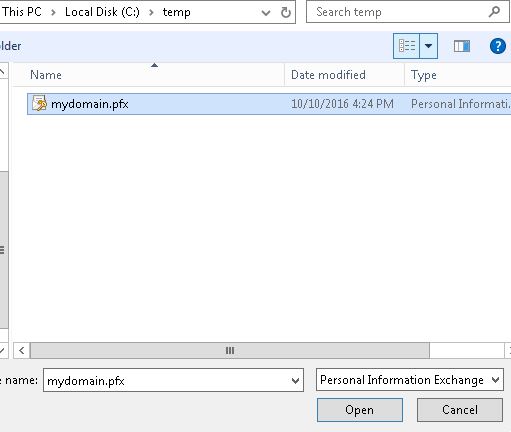
- Navigate to the folder where you exported the PFX file in Step 3 and select it, and then click Open
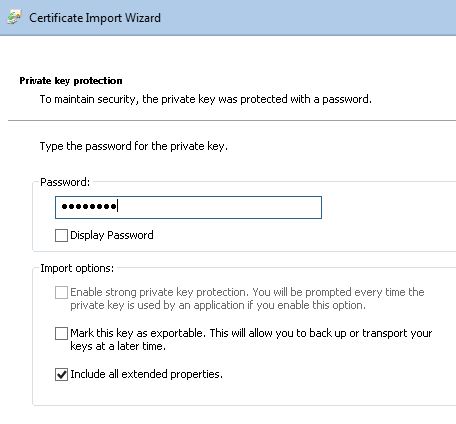
- Private key protection window, type the same Password you used to export the PFX file in Step 3 and click Next
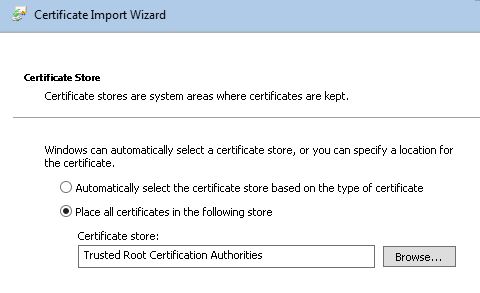
- Double check the certificate will be placed at Trusted Root Certification Authorities, and click Next, then Finish
- Restart any browser you have open, and test again
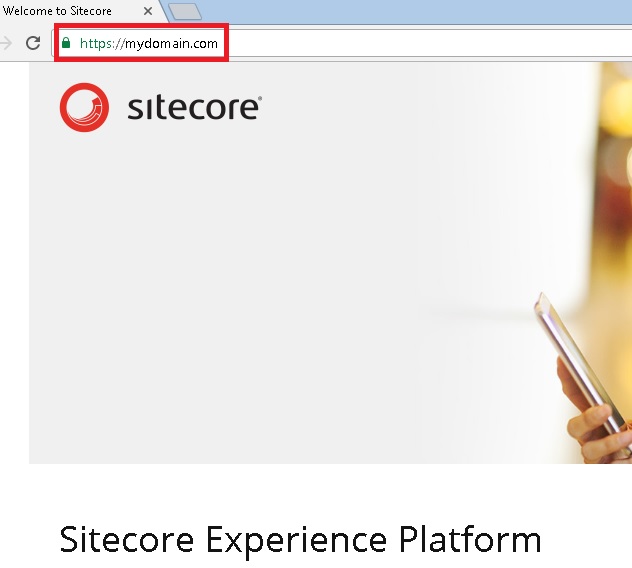
Voilà! You are no longer seeing the error!
Thanks for reading, and I hope you enjoyed!
I’ll see you in the next post!